Real Estate Drone Photography Tips That Sell Properties
In today's market, aerial photos can make or break a listing. Here's how to capture drone photos that actually help sell properties faster.
Real estate drone photography requires shooting during golden hour with the sun behind you facing the property front. Use auto bracketing (AEB) for HDR to capture detail in bright skies and dark ground. Essential shots include front elevation, 45-degree yard angle, bird’s eye straight down, and backyard entertainment areas. Deliver 10-15 edited photos within 24 hours for repeat business.
Nothing stops a scrolling thumb faster than a stunning aerial shot of a property. If you’re not using drone photography in real estate listings, you’re leaving money on the table. Buyers spend significantly more time on listings with aerial imagery, and agents consistently report faster sales.
Timing Is Everything
Shoot when the sun is behind you, facing the property front. Early morning or late afternoon golden hour depending on the home’s orientation. You want warm, even light on the facade — not harsh shadows or blown-out highlights. Midday creates vertical shadows and flat lighting. Plan around the property’s orientation, not just the clock.
Camera Settings
- Shoot RAW. No exceptions. Maximum flexibility in post-processing.
- Auto bracketing (AEB) for HDR. Three to five exposures at different stops. Ensures detail in bright skies and dark ground areas.
- Grid lines on. Crooked horizons in real estate photos look unprofessional and make expensive properties feel cheap.
The Essential Shots
Front elevation straight-on — Your hero shot. Moderate height showing roofline and front yard, but low enough that the home looks substantial and inviting.
45-degree angle showing yard — Captures the front facade with side yard, landscaping, walkways, and outdoor features ground photos miss.
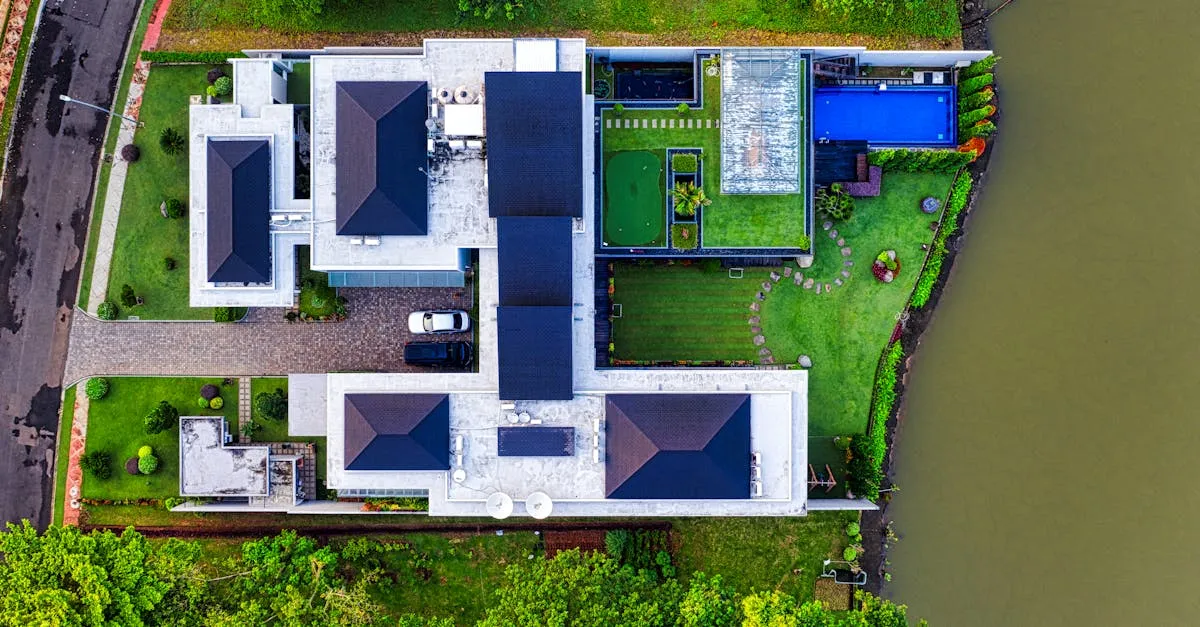
Bird’s eye straight down — Shows property boundaries, lot size, and relationship between house, outbuildings, and outdoor areas. Buyers love this because it answers spatial questions immediately.
Backyard and pool area — Elevated angle showcasing the entire outdoor entertainment space. Pool in summer, fireplace in winter.
Neighborhood context — Pull back to show nearby parks, golf courses, lakes, or shopping centers. Tells the location story in one image.
Corner lot showing both streets — Demonstrates extra visibility and curb appeal.
Composition Tips
- Keep horizon level (yes, really, every time)
- Avoid power lines in frame
- Focus on curb appeal: clean lines, manicured lawns
- Capture seasonal features (glistening pool in July, chimney smoke in December)
- Include the “for sale” sign in at least one shot — agents love the branding
Post-Processing
- HDR merge in Lightroom from bracketed exposures
- Straighten verticals — converging lines scream amateur
- Boost shadows to reveal detail under soffits and in dark landscaping
- Add clarity for architectural details (don’t overdo it)
- Export at full resolution for print and web
Delivery That Wins Repeat Business
Deliver 10-15 edited aerial photos per listing, named by shot type. Send via cloud link within 24 hours. Fast turnaround and organized delivery separate you from hobbyists who take days to send random files. Reliability wins repeat business.
Frequently Asked Questions
When is the best time to shoot real estate drone photos? Golden hour, early morning or late afternoon, but plan around the property’s orientation. You want the sun behind you, facing the property front for warm, even light on the facade.
What are the essential shots for a listing? Front elevation straight-on as the hero shot, 45-degree angle showing the yard, bird’s eye straight down for property boundaries, backyard and pool area, neighborhood context, and both street fronts for corner lots.
Why use auto bracketing for real estate photos? AEB captures three to five exposures at different stops, ensuring detail in both bright skies and dark ground. HDR merge in Lightroom combines these for a balanced final image.
How should I deliver photos to agents? Deliver 10-15 edited aerial photos per listing, named by shot type. Send via cloud link within 24 hours. Fast turnaround and organized delivery separate you from hobbyists and win repeat business.
What post-processing is essential? HDR merge in Lightroom from bracketed exposures, straighten verticals because converging lines look amateur, boost shadows under soffits and dark landscaping, add clarity for architectural details, and export at full resolution.
How high for front elevation shots? Moderate height showing the roofline and front yard, but low enough that the home looks substantial and inviting. Too high makes the property feel small and disconnected. The goal is to enhance curb appeal. Our free Real Estate Drone Course covers every shot, camera setting, and pricing strategy for building a real estate drone business.